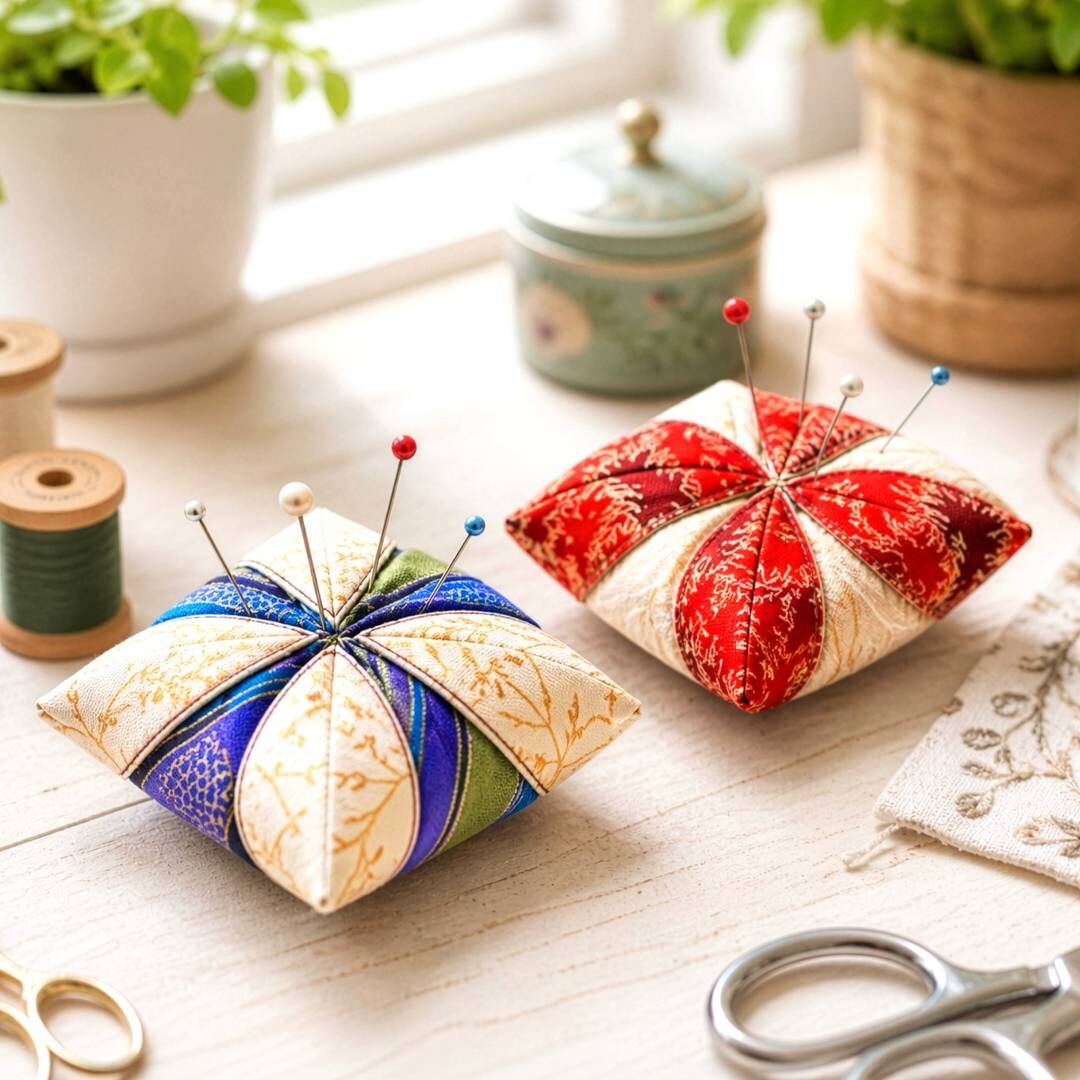
塞入棉花|立體針插
四瓣分區能自然整理不同尺寸的珠針,飽滿花瓣也讓作品穩穩停在桌面;中央可再以鈕扣或牢固手縫加強定型。
Add filling|Sculptural pincushion
The four sections help organize pins while the plump base sits steadily on your table. Finish the center with secure stitches or a button.
{{ 'fb_in_app_browser_popup.desc' | translate }} {{ 'fb_in_app_browser_popup.copy_link' | translate }}
{{ 'in_app_browser_popup.desc' | translate }}
滿 NT$1500 享免運費|台灣限定
{{ childProduct.title_translations | translateModel }}
{{ getChildVariationShorthand(childProduct.child_variation) }}
{{ getSelectedItemDetail(selectedChildProduct, item).childProductName }} x {{ selectedChildProduct.quantity || 1 }}
{{ getSelectedItemDetail(selectedChildProduct, item).childVariationName }}
從一個圓開始,把四個等分點往中心收攏,就能塑出柔軟立體的花瓣。塞入棉花,是縫紉桌上實用又好看的針插;保留輕薄手感,則能加上掛繩,成為窗邊、門把或牆面的布藝吊飾。
Begin with one circle, bring four evenly spaced points to the center, and shape soft dimensional petals. Add filling for a practical pincushion, or keep it flat and add a loop for a light fabric ornament on a wall, window, or doorknob.
影片示範的是不填棉版本:將圓布收攏、固定、翻整成四片花瓣,再加上掛繩完成布藝吊飾。先看過一次,再跟著步驟慢慢做會更容易掌握。
The video demonstrates the unfilled version: gather the circle, secure the center, turn four petals, and add a loop to finish the hanging ornament.
先把圓周四等分點標清楚;收線時逐瓣調整份量,不必一次拉到底,成品會更平均。
Mark all four quarter points clearly. Adjust one petal at a time as you gather instead of pulling everything tight at once.
只要改變是否填棉與最後的收尾方式,就能讓同一款造型融入縫紉桌或居家角落。
The same folded form takes on a different purpose depending on whether you add filling and a hanging loop.
四瓣分區能自然整理不同尺寸的珠針,飽滿花瓣也讓作品穩穩停在桌面;中央可再以鈕扣或牢固手縫加強定型。
The four sections help organize pins while the plump base sits steadily on your table. Finish the center with secure stitches or a button.
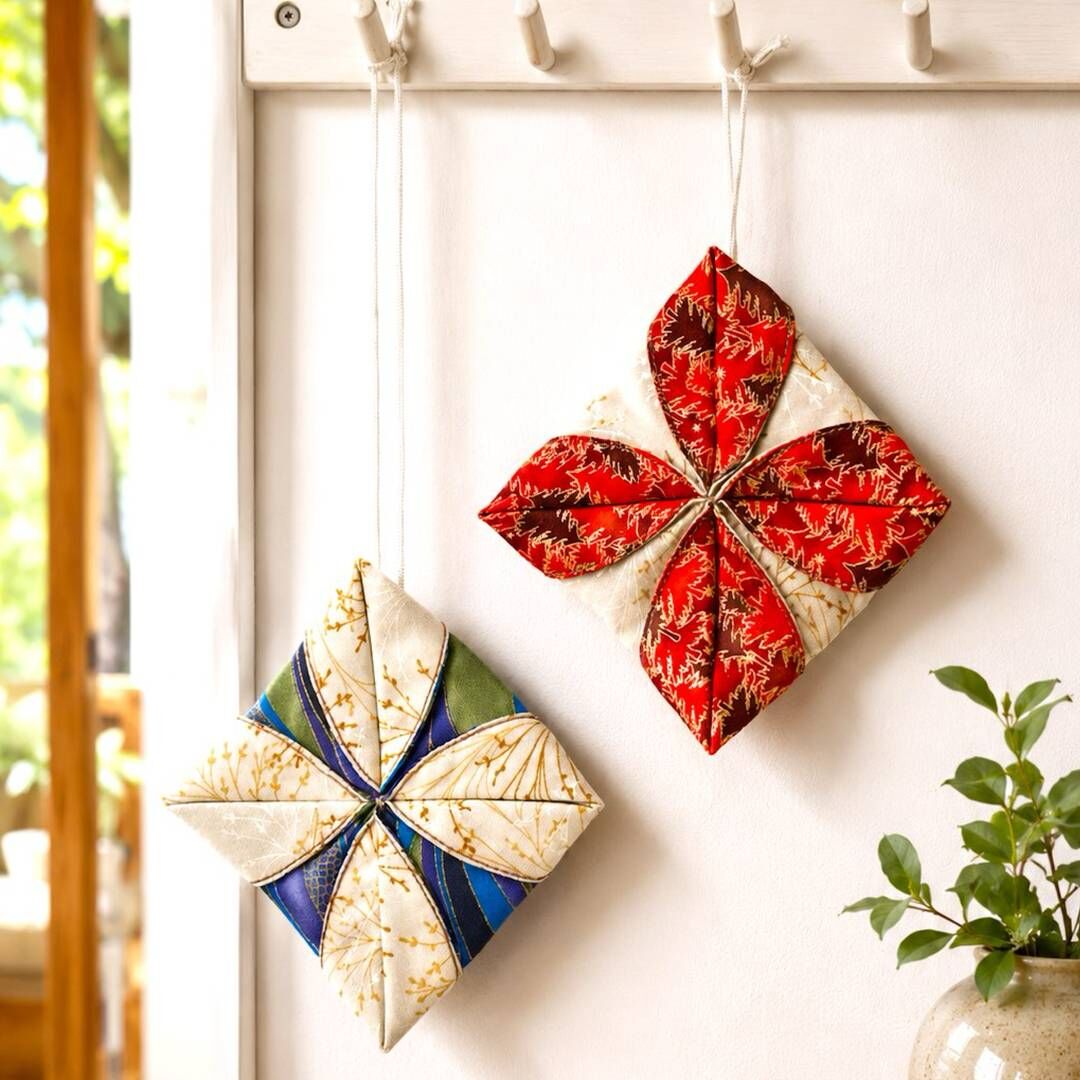
保留扁平、柔軟的花瓣輪廓,在上方縫入細繩就能垂掛。花布與素色交錯後,遠看像花,也像一枚布折紙裝飾。
Keep the petals soft and flat, then stitch a slender loop into the top. Contrasting prints create a form that feels both floral and origami-like.
適合消耗手邊零碎布,也很適合一次做成不同配色的小禮物。
A satisfying scrap-friendly project—and an easy handmade gift to repeat in several colorways.
裁一片直徑約 18 cm 的圓布,在上、下、左、右標出四個等分點,作為收攏定位。
Cut an approximately 18 cm circle and mark the top, bottom, left, and right quarter points.
依序把四個定位點拉向中心。影片示範的吊飾保持輕薄;想延伸做針插時,再分區塞入棉花。
Bring all four marked points to the center. Keep it flat for the ornament shown in the video, or add filling for the pincushion variation.
調整四瓣份量後,在中心交會處反覆縫合固定;需要吊掛時,同步把掛繩縫牢。
Balance the four petals, stitch the meeting point firmly, and add the hanging loop now if needed.
把四個角的布片往外翻開,輕推弧線讓花瓣對稱;針插中央可加鈕扣裝飾。
Turn each corner outward and refine the curves. Add a center button to the pincushion if you like.
依照習慣選擇描圓後用剪刀裁切,或搭配輪刀直接完成;翻面前修剪弧線縫份,也能讓外緣更細緻。
Trace and cut with scissors, or use a rotary tool for a direct cut. Notching the curved seam allowance also creates a cleaner turned edge.
← 左右滑動查看工具 →← Swipe to explore tools →

Choose from 130 circle sizes and trace an even shape quickly—ideal when repeating the project in multiple diameters.
View Tool →
Set the center and radius, then rotate to cut without tracing first—a faster option for making several circles.
View Tool →
Use the printed arcs and angles to draw curves, or guide a rotary cutter directly along the ruler edge.
View Tool →
Trim the curved seam allowance into even notches to reduce bulk and create a smoother edge after turning.
View Tool →小碎花會形成細緻萬花筒效果;大朵水彩花卉則讓每一瓣都像獨立畫面。想讓摺線更醒目,可搭配一深一淺或冷暖對比的布色。
Tiny florals create a kaleidoscope effect, while painterly blooms give each petal its own composition. Pair light and dark or warm and cool colors to emphasize the folds.
← 左右滑動挑選花色 →← Swipe to choose a print →

Indigo, lavender, and airy white petals gather into a cool, translucent bloom with beautiful depth.
View Fabric →
Fresh green brushwork and white, yellow, and pink flowers reveal a different cheerful color mix in every fold.
View Fabric →
Midnight blue, misty clouds, and tiny golden stars create a dreamy ornament, especially when paired with ivory.
View Fabric →
Peach and pale green roses glow on cream, pairing beautifully with warm gold-brown or coral coordinates.
View Fabric →
Dense red, blue, violet, and orange blossoms stay richly colorful after folding—perfect for a lively pincushion.
View Fabric →
Large pink, violet, and blue hydrangeas give each petal a different painterly crop and gentle expression.
View Fabric →
Muted leaves and pale blue flowers create calm, timeless petals for a nature-inspired hanging ornament.
View Fabric →先跟著影片完成不填棉的吊飾,再換一組花色,或延伸嘗試填棉針插。小小的四瓣造型,可以成為送給朋友的手作吊飾,也能每天陪你縫紉。
Follow the video to make the unfilled ornament first, then try another print or extend the idea into a filled pincushion for your sewing table.


